I am a software engineer, and a Blockchain enthusiast, originally from Tunisia. I have a master degree in IT Engineering and I’ve been working with IBM Cloud for about a year.
Why IBM Cloud ?
IBM effectively entered to the cloud market in 2009. Since then, IBM constantly evolved its products to continue meeting its partners and clients needs. As a cloud developer, I have many reasons to use IBM Cloud.
First of all, IBM Cloud offers an end to end catalog of products and services that offer everything you need to build modern applications. You can find databases, AI, security, orchestration, Internet of Things, Blockchain and much more.
Second, IBM Cloud is very aligned with DevOps methodology, providing a complete set of services for continuous software delivery enabling developers to focus on innovation while accelerating the delivery process.
Third, if you are an application developer, you often need to deploy and test. IBM Cloud offers a variety of deployment options, from a simple Cloud Foundry push command to a customized Deployment Pipeline.
Deploying a Node.js App on IBM Cloud
After the small introduction to IBM Cloud from a developer perspective, let’s move directly to the serious talking. To briefly describe what this article is about, we will create a simple node.js/express application, add it to GitHub, create a delivery pipeline, and deploy our application.
So, to focus on the application delivery process, I want to skip the parts where we create the node.js/express application and we add it to GitHub.
I put here some useful articles that explain how to create node.js/express application and how to add a repository to GitHub:
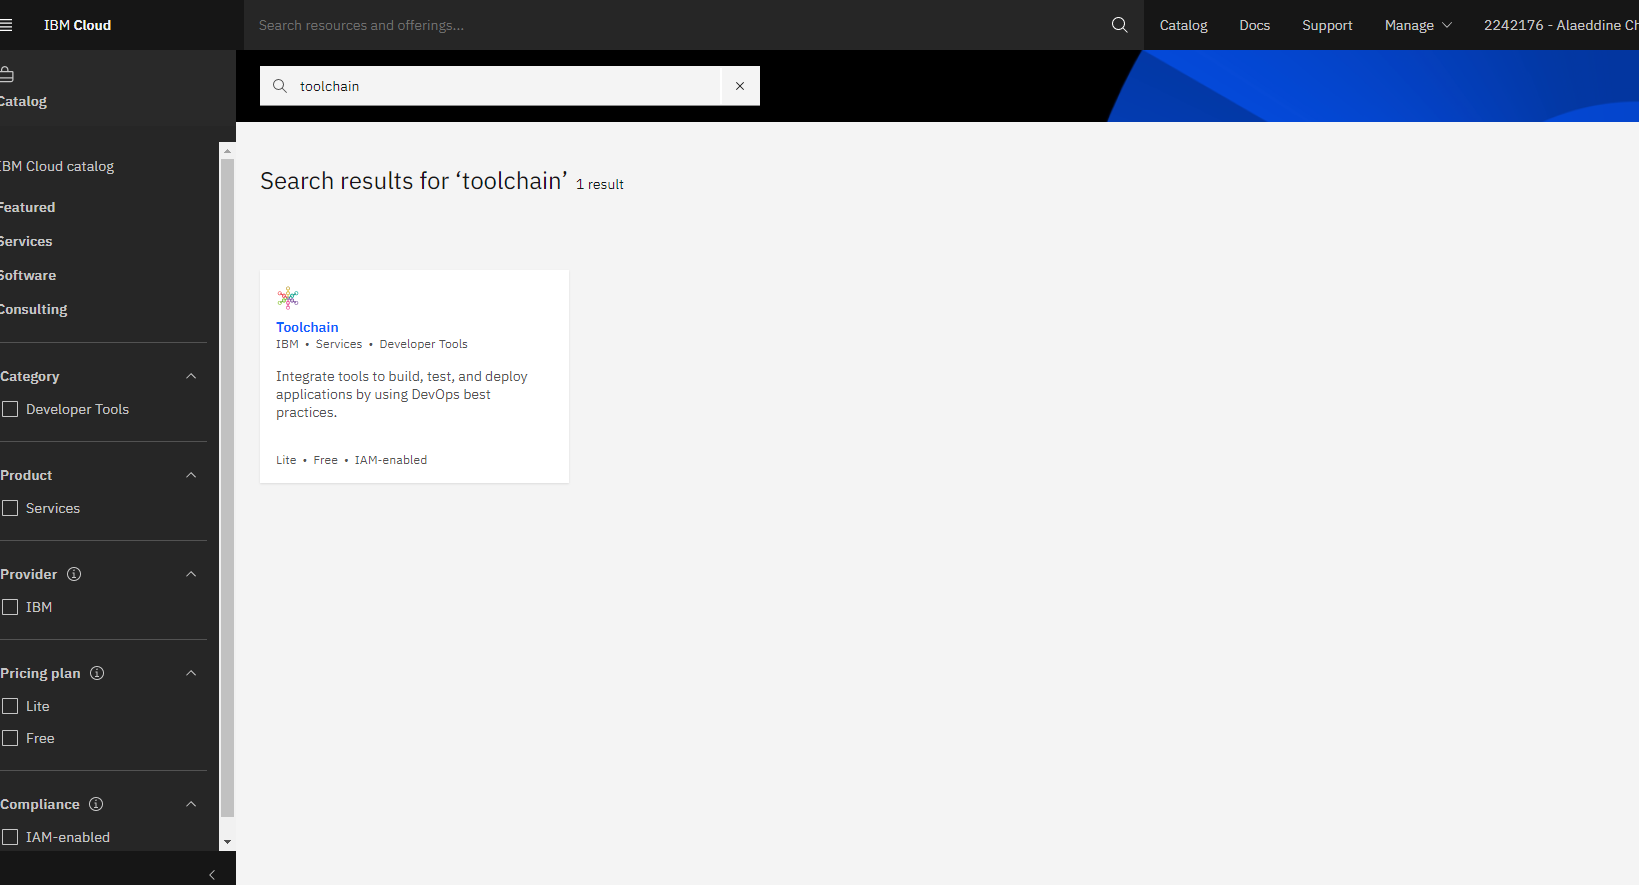
Once you log in to IBM Cloud, jump to the Catalog and look for “Toolchain”.
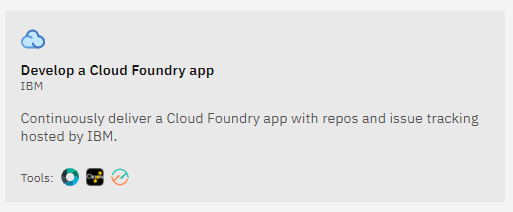
Go to Toolchain and choose “Develop a Cloud Foundry app” template.
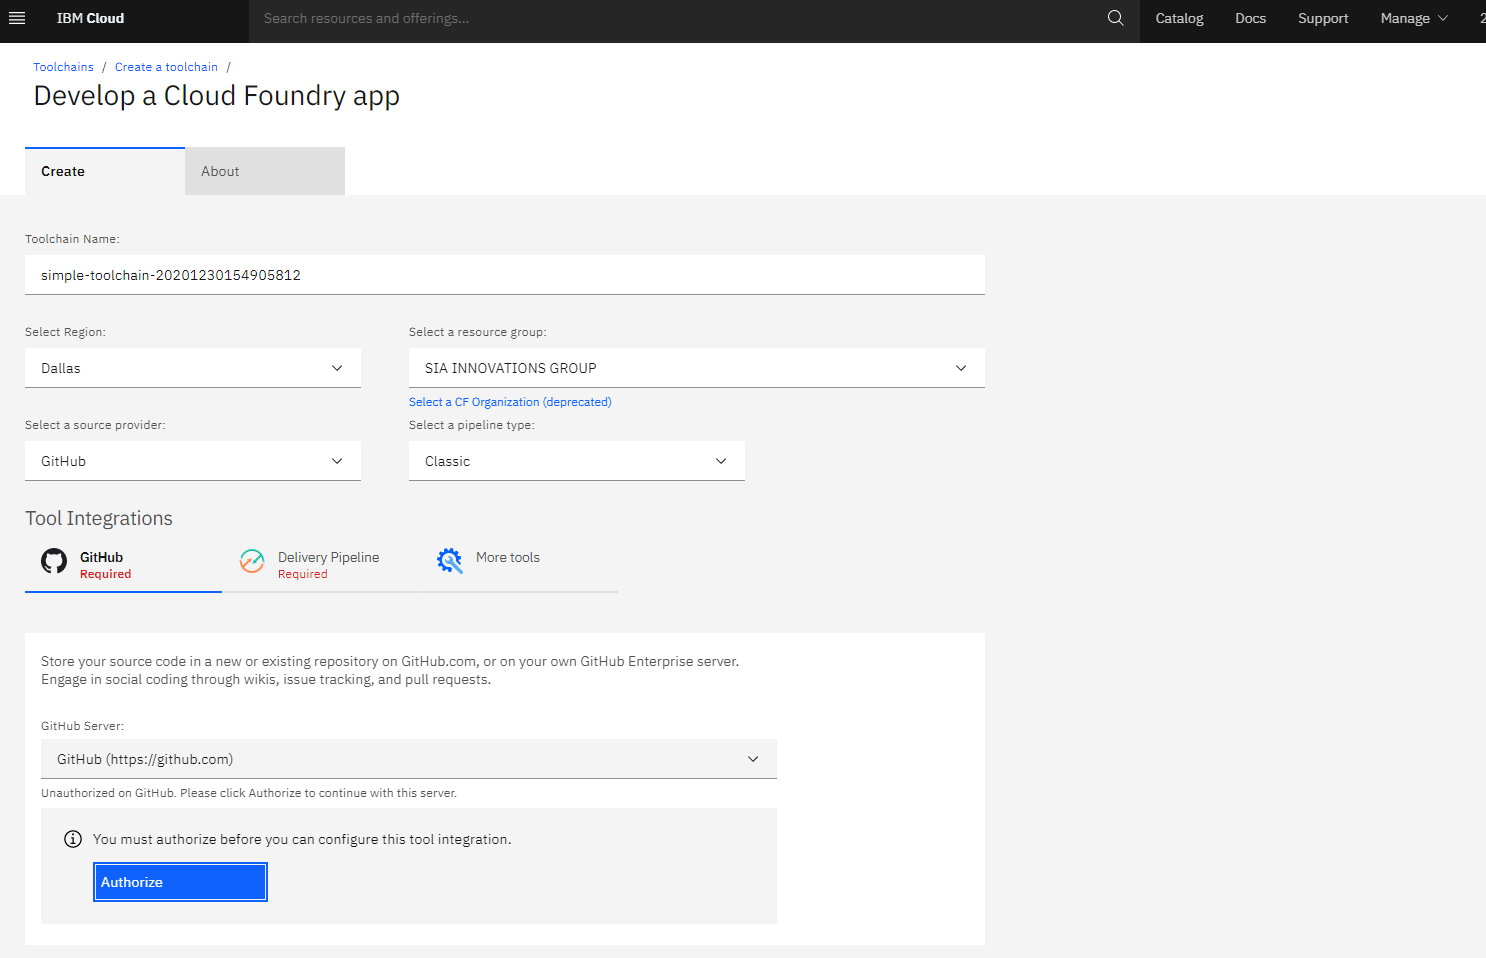
In the config page that appears, you can create a customized Toolchain Name as long as it is unique, select the region and a resource group.
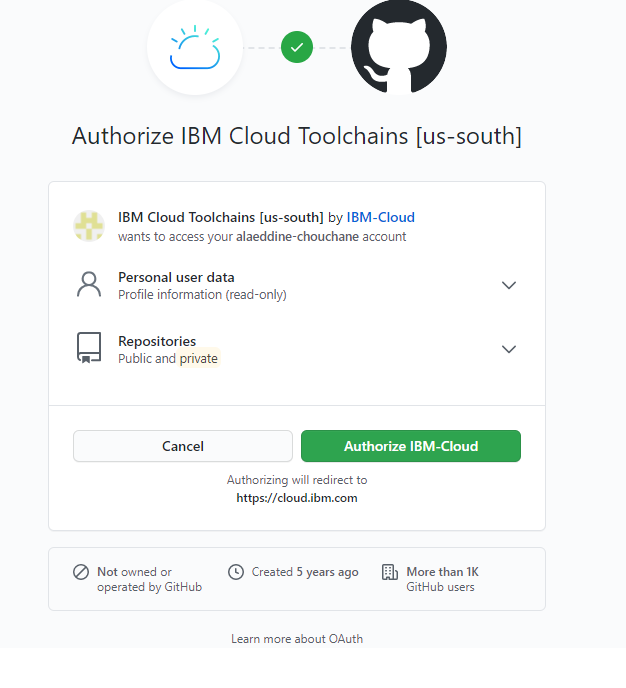
In the “Select a source provider” scrolling list, choose “GitHub”. Then, go down and click on “Authorize”.
Click on Authorize IBM-Cloud .
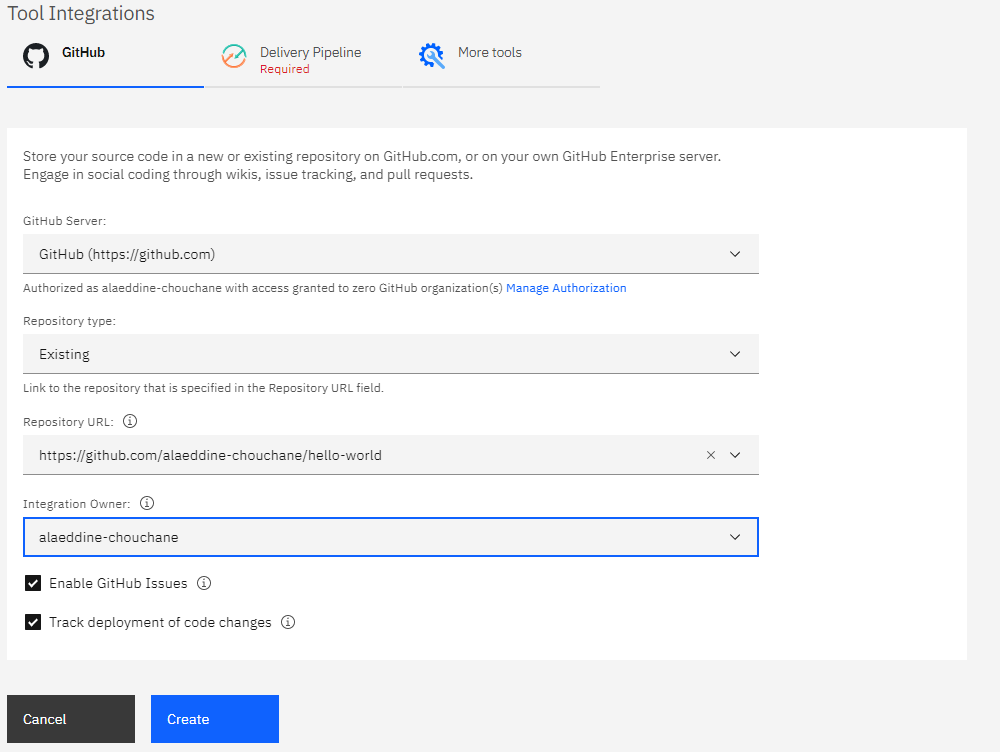
Once you get authorized, choose “Existing” option in “Repository type:”, and paste the repository URL in “Repository URL:”
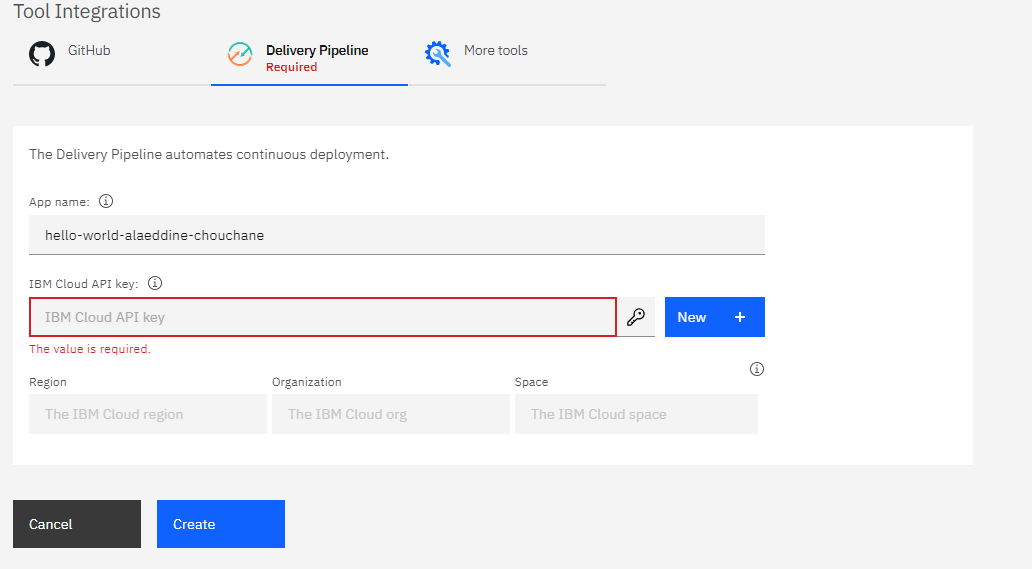
Next, go to the Delivery Pipeline. You can choose a different “App name”, and you need to put an existing “IBM Cloud API key” or create a new one.
This will allow the application to access the IBM Cloud Runtime.
Finally, confirm your configuration by hitting “Create”. If everything goes as expected, you’ll have a screen with your Toolchain template running.
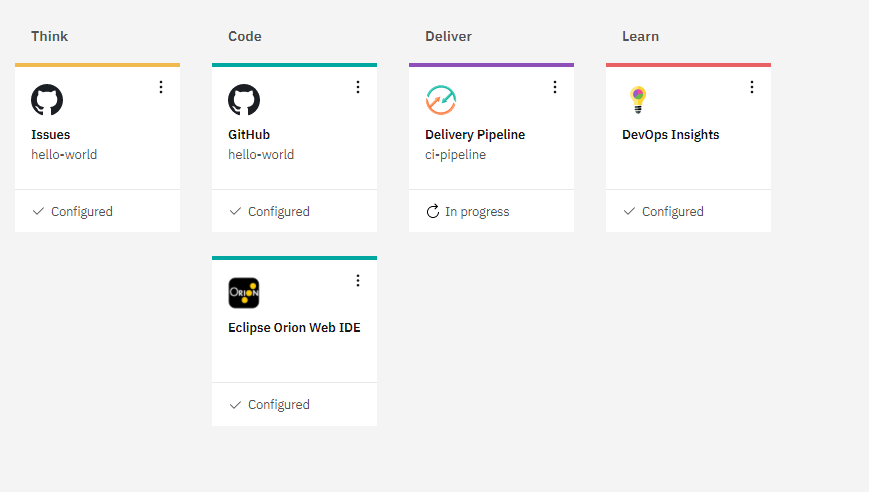
IBM Cloud offers multiple tools that supports developers throughout their innovation journey. You can track issues posted by you app users. You have “Eclipse Orion Web IDE” to edit and debug your code.
Besides, you have a configurable Delivery Pipeline tool. The DevOps Insight helps you track your build and deployment jobs, with quality metrics.
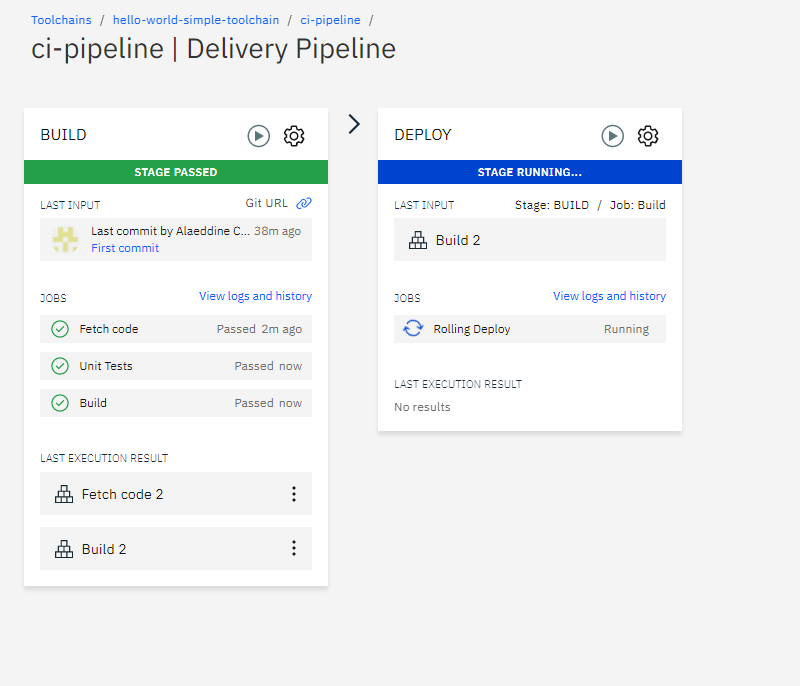
Let’s go to Delivery Pipeline and see what we find.
By default, there are two stages in the template that we used, but you can always add or delete stages according to your needs. You can also configure the “JOBS” inside each stage.
But for the sake of this tutorial, we will leave the configuration as it is.
Accessing the application
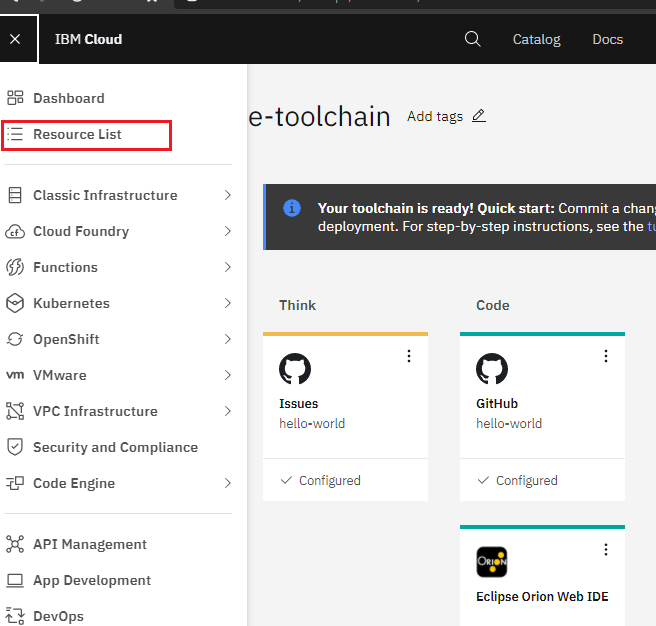
So once the deploy stage passes, you can check if your application is up and running. To do so, click on the Navigation Menu on the upper left, then jump to “Resource List”.
Under “Cloud Foundry apps”, you should find the application you’ve just deployed.
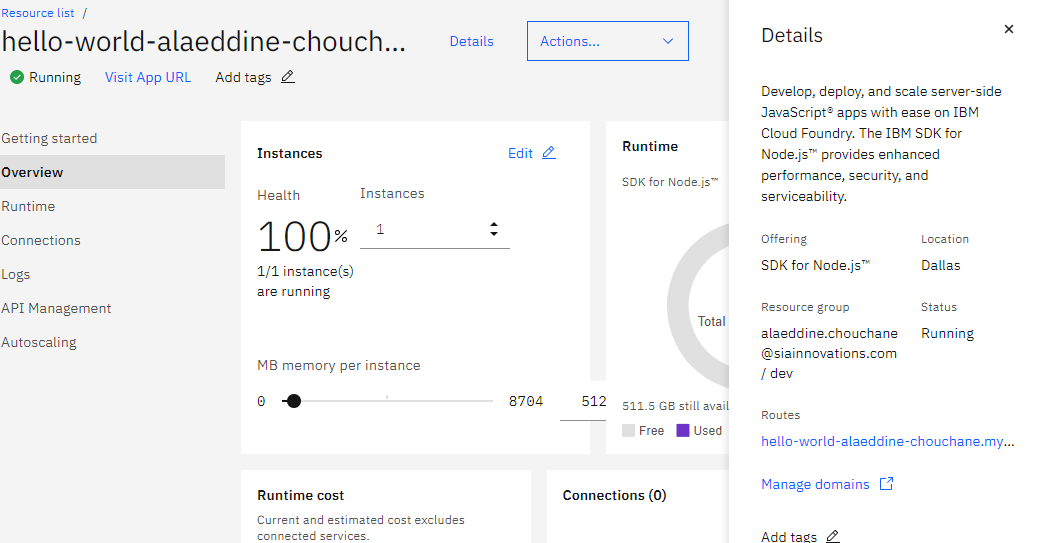
When you enter to your application, you’ll find details about the instance health, allocated resources, and runtime cost. You will be able to customize the number of instances, and the allocated memory for each instance.
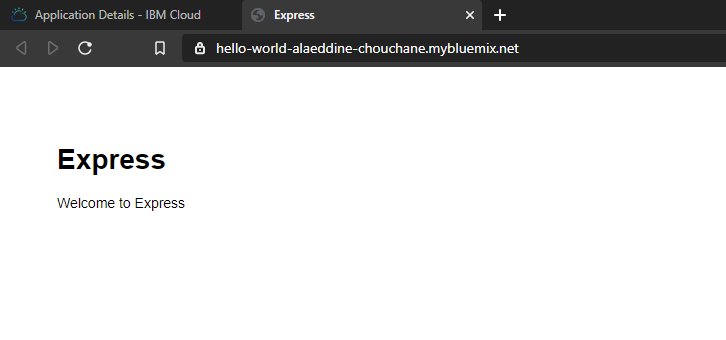
To test your application, you can go to “Details”, and go to the URL under “Routes”.
And here is the final result!
A small wrap up and I’ll let you go…
Here is what we discussed today:
An overview of IBM Cloud powerful features that enhance applications developing experience,
A Node.js application deployment on IBM Cloud using Toolchain, and a continuous delivery pipeline,
Some of the configurations and features provided by Toolchain and Cloud Foundry.